
Mini Angle Sensor Module Potentiometer Inside Resistance Adjustable GPIO GROVE Connector
Description:
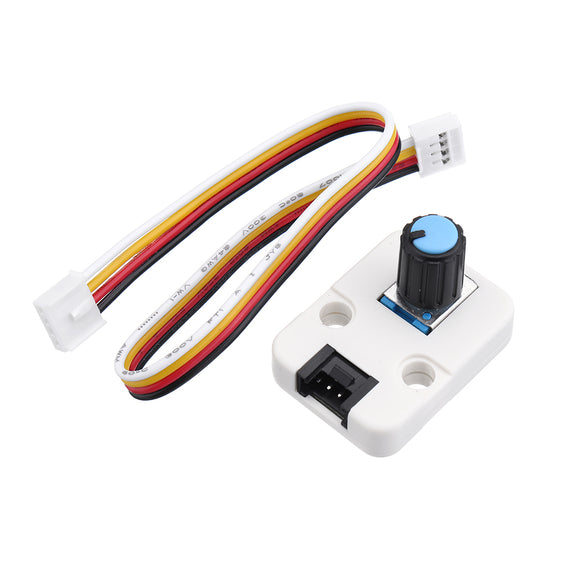
AN GLE is a rotary switch Unit,simply having a 10K potentiometer inside. This unit can be used for Continuous singal control, such as volume, brightness, or motor speed.
A potentiometer is a manually adjustable, variable resistor with three terminals. Two terminals are connected to a resistive element, the third terminal is connected to an adjustable wiper. The position of the wiper determines the output voltage. The out voltage is captured and converted by AD on ESP32 on portB.
In M5Stack product system, Normally the Grove color indicates the type of communications.
- Black: Single BUS (AD ,DA ,GPIO)
- Red: I2C
- Blue: Uart
- White: Others(depends)

The Unit's Grove interface is black, indicating an analog interface that needs to be connected to the M5Core's GROVE B interface.
Product Features:
- Output voltage range: 0 ~ 2500mV
- GROVE interface, support UIFlow and for
- Two Le go-compatible holes
- Product Size: 32.2mm x 24.2mm x 21.7mm
- Product weight: 5.6g
Package Included:
- 1x AN GLE Unit
- 1x Grove Cable
Related Link
EasyLoader
1.EasyLoader is a simple and fast program burner, and each product page has a product-related case program for EasyLoader.
2.After downloading the software, double-click to run the application, connect the M5 device to the computer via the data cable, select the port parameters, and click "Burn" to start burning.
3.The CP210X (USB driver) needs to be installed before the EasyLoader is burned. Click here to view the driver installation tutorial
Example:
1. IDE
The code below is incomplete. To get the complete code, please click here.
Example function: Display the digital value converted from the Unit output voltage (0 ~ 4095)

2. UIFlow
If you want the complete code, please click here.

Schematic:
